
In the previous rendering customization post, we went over a very simple hero rendering with only two basic fields. What if we wanted to make this rendering more complex though? Say we want to add some CTA buttons, how would we go about doing that with rendering variants? Let’s take a look at our options.
Step one is to take a look at the markup we want to create and get a better idea for what edits we need to make to our data template. We’ll just be adding a new row with links directly underneath the title.
<section class="container component-hero" style="background-image: url(BackgroundImageField);">
<div class="hero-container">
<div class="row">
<div class="col-xs-12 col-sm-8">
<div class="hero-title">
<h1>HeroTitleField</h1>
<div class="row">
<div class="col-12">
<a class="hero-cta-link" href="CTALinkUrl">CTALinkTitle</a>
<a class="hero-cta-link" href="CTALinkUrl">CTALinkTitle</a>
<a class="hero-cta-link" href="CTALinkUrl">CTALinkTitle</a>
</div>
</div>
</div>
</div>
</div>
</div>
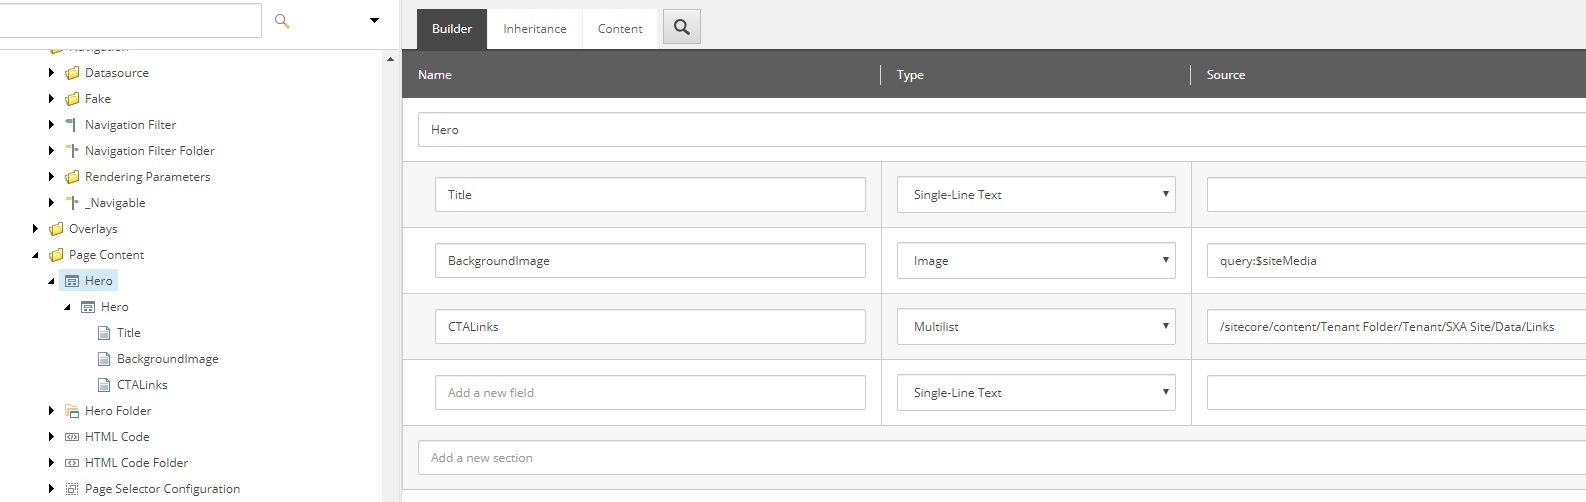
</section>With this update in mind, we need to update our template to support those CTA links. Since this is just an example, we’re going to do this by adding a Multilist field which will be used to select out of the box SXA link items. The SXA link template is just a single General Link field, which we can use to select a link and set the display title with the Description field. Again, for the sake of this examples simplicity, we’ll just set the source directly to the link folder in our site data.
Now that we have our updated template, lets go back to our rendering variant. We have two options for rendering these links, each with their own pros and cons.
- Use a VariantReference item to switch context and loop through the items in our multilist
- Use an NVelocity template to generate the code
For this example, at first glance I believe the first option is definitely the better choice. The markup we are generating for each CTA link is very basic and does not require any advanced markup, so the easiest method is the preferred method. Don’t worry though, we’ll be taking a look at NVelocity templates later to see when and how they can be used.
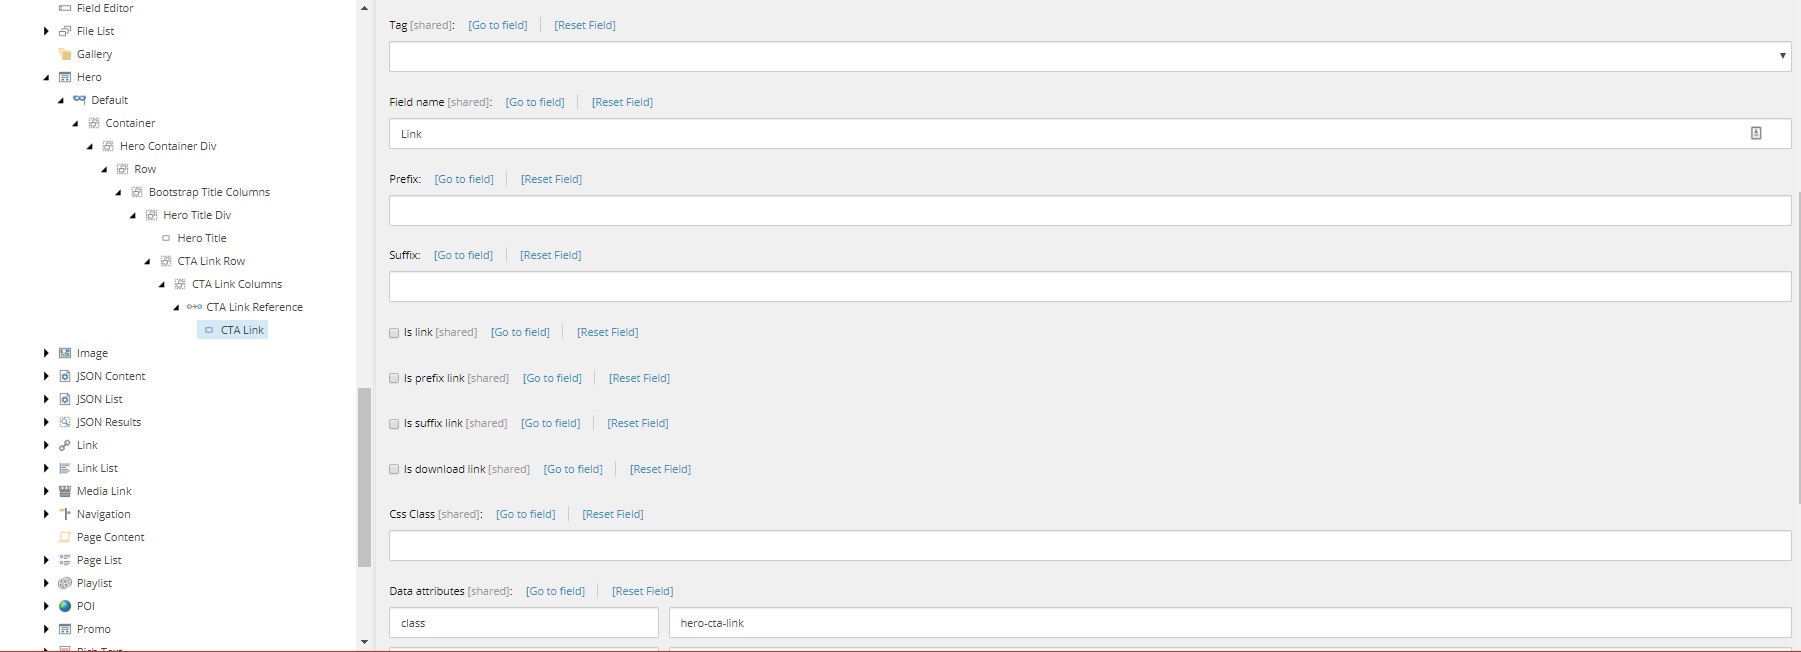
Having made our decision, we’re going to go ahead and add the new row and column sections as a sibling to the title node. Once we have the CTA row scaffolding created, we will insert a VariantReference item. The VariantReference item has a single Pass through field which we will set to our CTALinks field. What this does is essentially run a foreach loop and switch context to each target item in the selected pass through field. With that logic in mind, underneath the VariantReference item we will add a single VariantField item to represent our link. Here is where it gets a bit weird and you’ll need to trust me. We are going to leave the Tag field blank, set Field name to Link (this matches the name of the link field on the SXA Link items), scroll down and add a key-value pair in Data attributes for class : hero-cta-link.
At this point you probably have a lot of questions. Why did you leave tag blank? Why didn’t you check off Is link? Why didn’t you use the css class field or the Link attributes field to set the class of the link? Honestly, I really only have an answer for that first question.
Those link checkboxes are tied to the Field used as link target field found on the VariantDefinition item (Default in this case). Checking those boxes will override all links and use whatever link field is specified on the definition item. In this case, we do not want that, as we want to use the link from each multilist item.
With respect to the other questions, this is the solution that I found works through trial and error. I tried numerous other combinations and methods of getting the links to show up correctly, but SXA never was able to render them correctly with those other combinations. This is definitely something I’ve experienced and accepted as a difficulty while using SXA: the extra markup being rendered does not always make sense, can occasionally be troublesome, and cannot always be controlled.
Finally, we’ll add a bit of CSS to make these links look like buttons. Reminder: Never trust my opinions on design.
.hero-cta-link{
background-color: white;
color: black;
padding: 0px 15px;
margin-right: 20px;
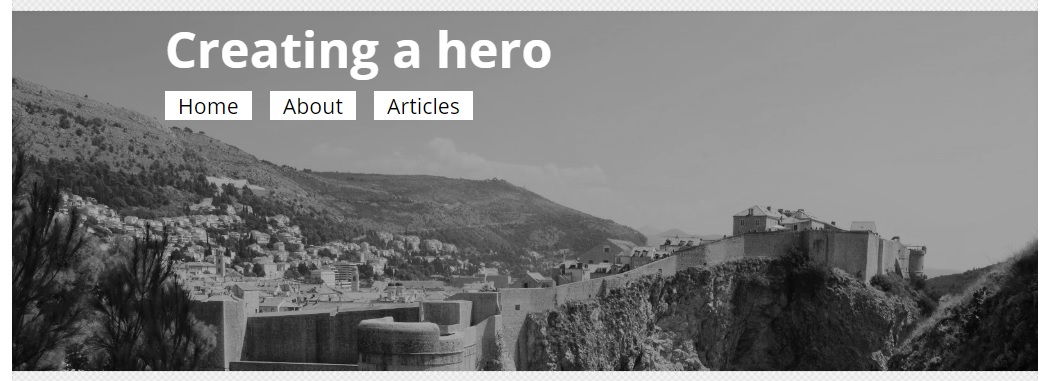
}And now if we create some link items (under the source location we specified on the template) and select some link items from our hero datasource, we should see some CTA Links being rendered!
The issue with this however (in my opinion), is that we don’t really have much control over the markup. To understand what I mean, lets compare the rendered markup to what we defined at the beginning of this post.
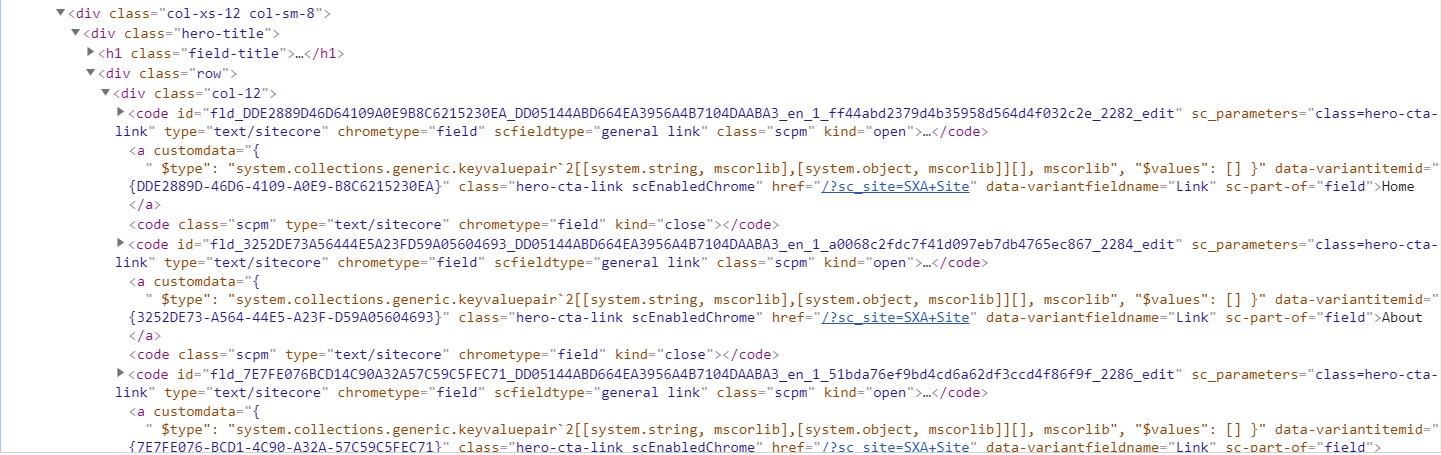
That’s a lot of generated markup, I just wanted some simple anchor tags! This is a great example for why I will definitely use variant references to switch context to different items for general markup, but I will probably lean towards NVelocity templates when working with links. NVelocity has so much more potential for customization and more finely tuned markup. In my next post, we’ll be switching these CTA buttons to NVelocity templates and covering the customization potential in NVelocity.