Our adventure begins directly after the successful installation of SXA 1.8. While we could take a look at what SXA offers out of the box, as a developer, I always find that getting my hands dirty allows me to learn the fastest. With that in mind, we’re going to go ahead and create a new Hero rendering. This rendering (for now) will be a simple image spanning the width of the viewport with a title field.
Traditionally in Sitecore development, you would begin by creating your template and rendering items manually, but this is SXA, and luckily for us Sitecore powershell extensions now run supreme. As such, our first step will be to use a script to clone the promo rendering.Why are we cloning promo?
- Navigate to
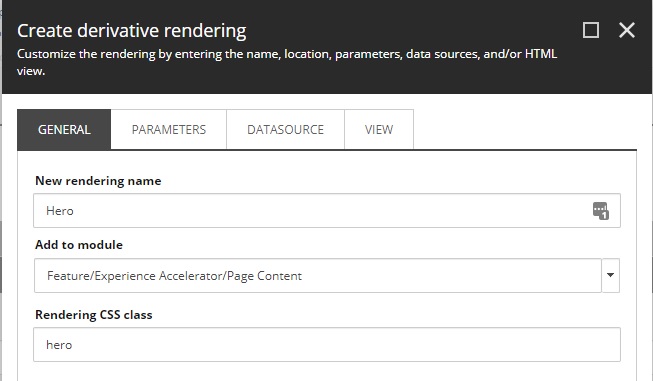
/sitecore/layout/Renderings/Feature/Experience Accelerator/Page Content - Right click on the Promo item, select Scripts, then Clone Rendering
- In the General tab, name the rendering Hero and leave the module as Page Content
- For both the parameters and datasource tabs, select the Make a copy option
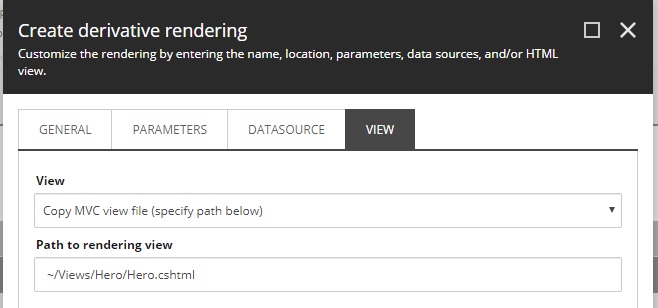
- For the View tab, select to copy the MVC view file and set the location as
~/Views/Hero/Hero.cshtml
Note: I’ve put the new rendering into its own folder for Helix practices. Additionally, while the copy action should make a new copy at the specified location, I’ve found that it errors out sometimes. Bug? In that case, simply create the folders manually and make a copy of the Promo rendering in that folder. Promo rendering location is Views/Variants/Promo
After clicking proceed, the script will work in the background to create all necessary items. So…what happened? What items exactly did that script create? Lets take a look at everyones favorite source of truth - SQL - for our answer.
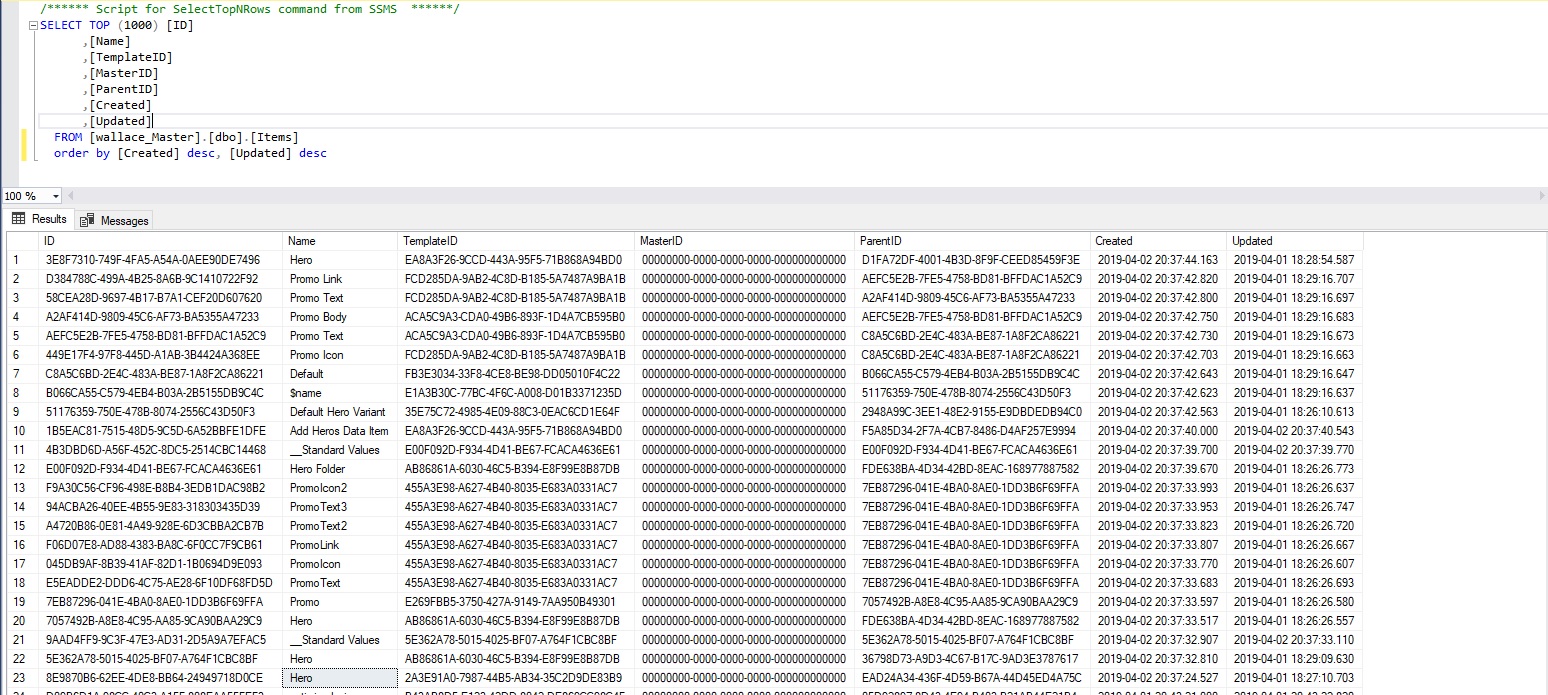
So, to recap, from top to bottom, the following items were created:
- Page content module site setup rendering variant (line 1)
- Page content module site setup default hero rendering variant (line 2-9)
- Page content module site setup (line 10)
- The hero datasource folder template with standard values (line 11-12)
- The hero template (line 13-20)
- The hero rendering parameter template with standard values (line 21-22)
- The hero rendering (line 23)
Most of that makes sense, except for lines 1-10. What are these items? Do we need them?. While they are not completely necessary for single site solutions, they ensure that your new SXA component is compatible with the SXA site creation script. What these items enable is the scaffolding setup when creating a new site. In this example, since we added the hero to the Page Content module, those two items will make sure that the hero is added as an available rendering in future sites, and that the data folder will be prepoulated with a default rendering variant. Great! So it all works? Nope… while that gets setup for future sites, we still need to do this manually for our own site. To complete this setup:
- Navigate to
/sitecore/content/tenant/site/presentation/available renderings/page content - Edit the Renderings field and add the previously created Hero rendering
- Navigate to
/sitecore/content/tenant/site/presentation/rendering variants - Right click on the Promo rendering variant folder, duplicate, and name Hero
- Navigate to
/sitecore/content/tenant/site/dataand insert a hero datasource item folder. The folder template was created by the script earlier and is found next to all other generated hero templates
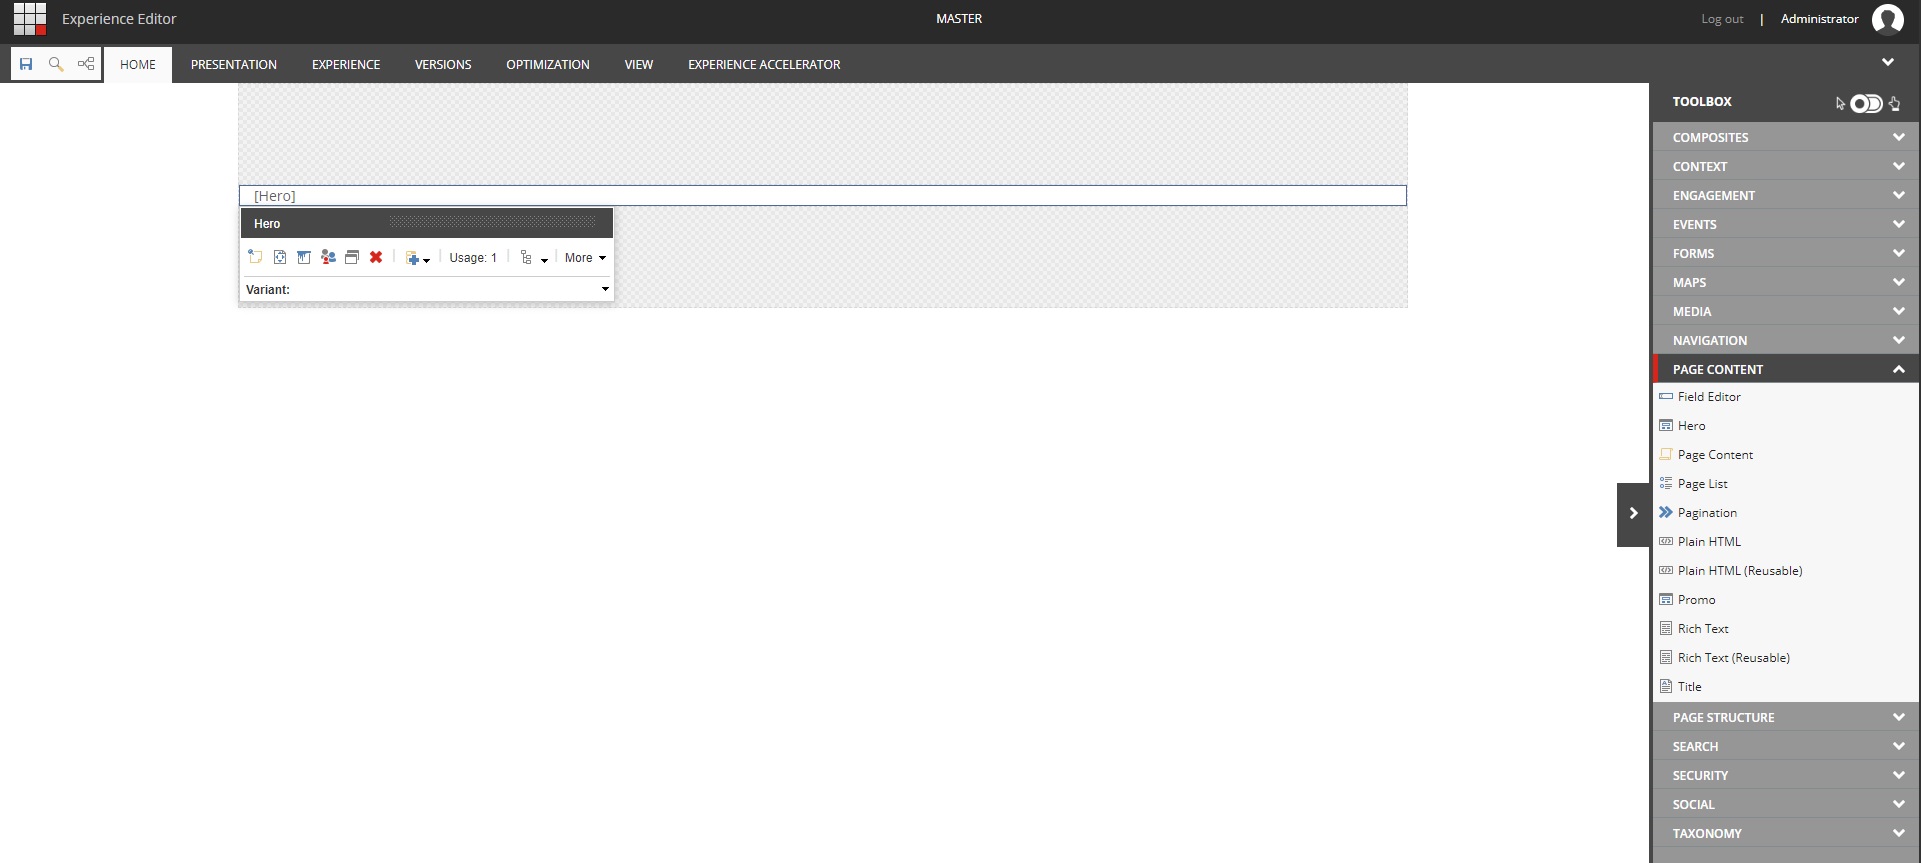
Great! We’ve now cloned the promo and created our own hero component. To test and make sure it works correctly, you can open a new blank SXA page in Experience Editor, and you should find the Hero component as a drag and drop option under Page Content. Of course, right now we’re still using the promo template and rendering variant markup. Part two will be looking at how to update that markup and finish our new component.